When this happens, often times available maps (i.e. USGS topo, Tom Harrison maps) are not sufficient because the trail / area you planning on using isn't there.
So some people like to use mapping software like National Geographic TOPO! or Garmin Mapsource to make maps and wapoints to print out and download to a GPS.
Well now I think there's a better, if not somewhat more tedious option.

You can now overlay USGS topo maps in Google Earth! The main benefit to me is the ability to create paths that rely on a combination of satellite imagery and topo maps. There are many instances where trails on topos aren't totally reliable, and if you are planning on going off trail, the satellite imagery is a big plus.
This stuff comes out from over at the Google Earth Library, who have created KML files not only standard 24K topos (USGS Topo KML), but also for historical topo maps! Historical Topo Maps KML
1) Save the kml files to your computer.
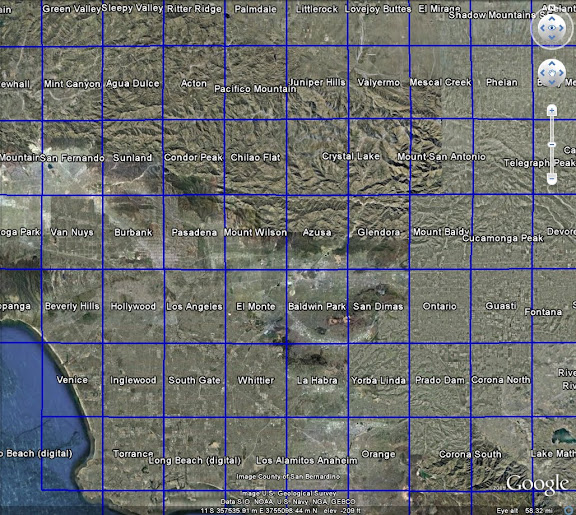
2) Open Google Earth, and open up the topo kml file. When opened make sure the button is marked on.
Now you'll see something like this:
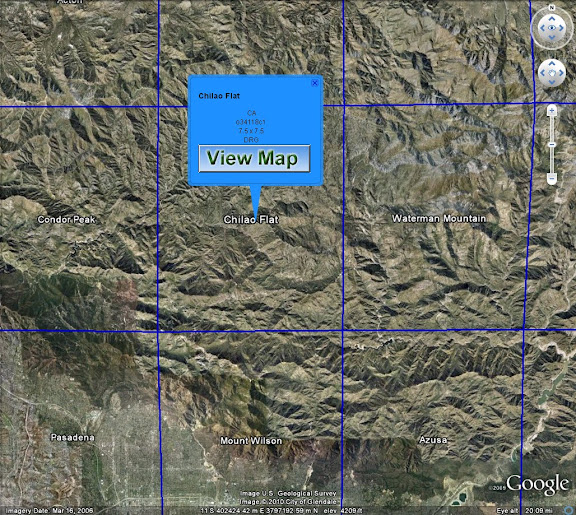
3) Find the topo you want, and you'll click on the name centered in the middle, and this blue screen should pop up:
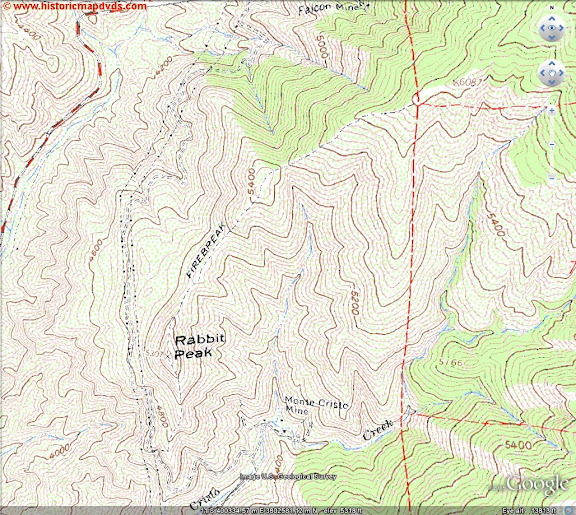
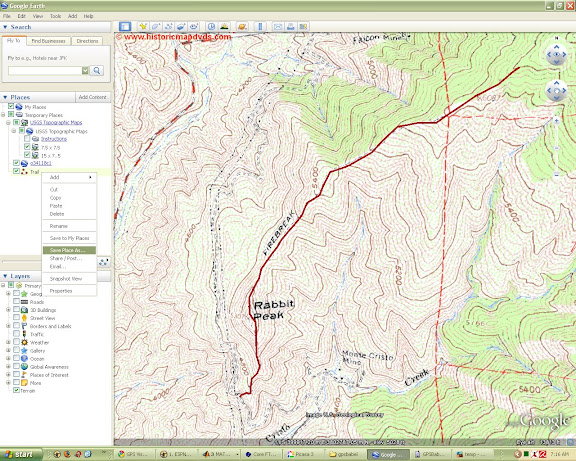
Now after clicking on "view map", the topo should load as such:
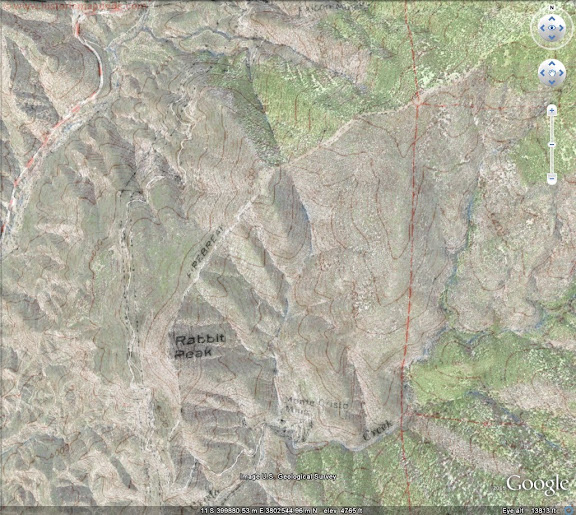
Now, find the text labeling the map in the Places panel on the left side. Click on this, then go down to the horizontal scroll beneath the panel. You can use this to adjust the opacity of the topo overlay, like so;
You could print this out, or, more likely, you'd like to add a path using the Path icon near the top. Make sure to increase the width to make it clear on the display.
4) Add points and make a path based on the topo / satellite data. When you're done, you could simply print this out, or continue on and export the data. Right click on your path in the Places panel, and save it as a .kml file.
Now, one downside with using Google Earth is that they will not allow access to the digital elevation model (DEM) they are using, so you will get out the latitude/longitude coordinates, but not the altitude. If you want to look at the elevation profile, you'll have to use other software. You could use TOPO! or Mapsource software perhaps. However, also take a look at GPS Visualizer.
5) Here you can click on the "Google Earth KML" option. Make sure to check on the "Add DEM elevation data". Select to import the kml file you created from Google Earth.
After processing, you'll be able to save the .kml file that know includes elevation data.
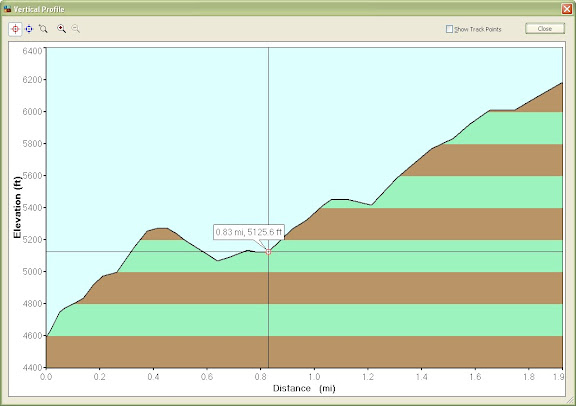
You can also view the elevation profile (and many other options) using other choices on the GPS Visualizer website.
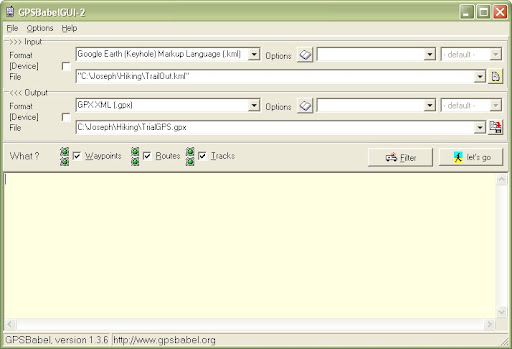
But let's say you now want to import this file onto your GPS device. If your software does not allow import of .kml files, you'll want to check out the very handy GPS Babel.
With the GUI interface, you can choose from many input / output options to convert GPS files. For instance, I chose to convert my .kml file to a .gpx file:
Now I import this file into my Garmin Mapsource software, where I can upload the track to my device as well as view the elevation profile.
Lastly, if you want to embed a topo on a website, you can do so using a few Google Earth embedding websites. One is the Google Earth Embed. Another which I use below is the TakItWithMe site.
The main step is determining the URL for the topo file. Back in Google Earth, check the numbers/letters that correspond to your topo file. For instance, my topo was called "o34118c1". Notice how the URL is created based on this info:
http://www.topomaparchive.com/maps/Topos_Current/34118/o34118c1.kmz
Add this in, you can create an embedded map like this:
These are just some examples of what can be done. I appreciate if anyone provides other suggestions.
Wow, that's hi-tech. Thanks for the instructions. I linked to this post on my most recent blog post.
ReplyDeleteOn another note, I appreciated your advice about Yucaipa Ridge. See you in the hills.
Great article, zé! I liked how you were able to embed the Google Earth viewer. Is there any way to control the opacity of the topo overlay within the embedded version?
ReplyDeletethanks.
ReplyDelete@jeff: not that I know of (I don't know much). from what I've seen from a few sites that create the embedding code, there's no option for opacity. I'm sure it's out there, or will be. I'll be on the lookout!
Fantastic! I've wanted to do this forever. Thank you!
ReplyDeleteAwesome article. Great info and the links made doing this as I read along a snap. Thanks!
ReplyDeleteWhere is Alaska?
ReplyDeleteI dunno I can't see it from my backyard. I guess the guy who made the *.kml file did not include it? I'll search to see if there is any update available.
ReplyDeleteThanks. We sure would like to be able to use this cool resource for our part of the US.
ReplyDelete